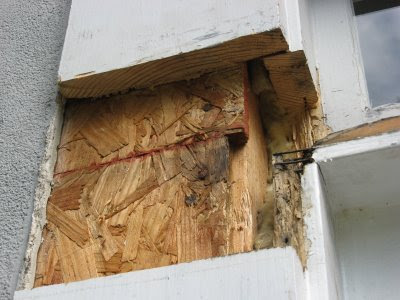

 This is another section, all cut out and left to dry in the sun. Pretty bad looking isn't it? I measured out a piece of wood to glue in using liquid nails.
  Here is my replacement piece, glued and nailed in. What do I use for filling all those cracks and crevices? The best product ever. I read about this a few years ago on several different websites about filling and repairing rotten wood. It's called Bondo and it's available in Lowe's and Home Depot.
This product costs about $10.00 and is a two-part putty. They use it for automotive repairs, but it's now commonly used to fill in areas in wood work. It's great stuff and hardens like a rock. So if you have a small area that you can't plug in with another piece of wood, you can use Bondo. It's not easy to use, because it drys so quickly, but you get use to working with it. I usually place the compound on a piece of cardboard, add the hardener, mix quickly and then apply. This stuff is "rot proof" and can be sanded. Photo below shows piece all sanded.
 All sanded and primed it now is clean, dry and strong. Oh yeah, it looks better too. I won't kid you though, it took a lot of work.
Fixing is one thing, but you know I needed to add some decorative touches. I am adding four decorative pieces to each corner. I've cut four pieces of pine measuring about 12" X 6" (the size of my door trim). In addition, each piece has a rosette and long trim.

So here is what we have:
- taking a tour can help you find all those potential "expensive" problems.
- Bondo works great for filling in rotted areas
- You can always add to the look of your door by adding decorative woodwork
- caulk, caulk, caulk. If I had caulked these areas faithfully, I wouldn't have rot at all. Check all your doors and windows....save yourself some money!
 01
02
03
07
08
11
12


You are so awesome to be sharing this practical how-to advice! Can you come to my house and help me?
ReplyDeleteI am so impressed how you just get in there and get the job done! So inspiring!
ReplyDeleteYou're The Woman!! Wow, I'm impressed. I'm going to have to get one of those saw thingies. :)
ReplyDeleteHa blue castle, you're so funny.......those saw thingies are great, you need to get one!
ReplyDelete