


When I first moved into my home my kitchen cabinets were painted a high gloss white. They looked very nice for a while, but I got tired of them. I'm not crazy about bright white in the kitchen and my tastes sort of lend themselves to earth tones. So about 8 years ago I painted them. At the time I thought painting them a beige tone and coating them with a darker beige tone, using lambs wool would be just perfect. Here is a photo of what they looked like when they were completed. The entire process took me 4 weeks. I have 44 cabinet fronts.
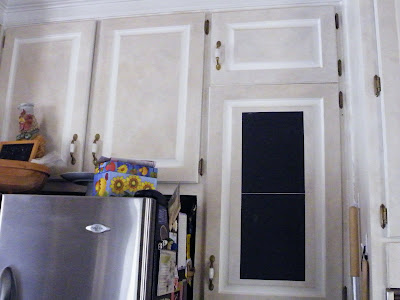


This process involved sanding each cabinet face, applying one coat of latex enamel beige (I used Behr paint) and then one coat of the a darker beige (applied with lambs wool). At the time I did plenty of research and found that most people felt that a coat of polyurethane would not be necessary, so I didn't apply one. The cabinets held up very well-lasting about 8 years.
Now, they are looking pretty scrappy. Most of the cabinets held up well over the years but the cabinets that were used the most really needed help. I decided to do the entire process over, but this time I changed the look completely. I liked the idea of an antique look and decided to go with that.
The Process
Each cabinet was sanded front and back using an electric sander, then cleaned with mineral spirits.
One coat of latex enamel was applied to the back and two coats to the front of the cabinet.
For this step I used a medium beige color (like the color of coffee with lots of cream).
I mixed a glaze (four parts latex paint + one part glaze). For this I used a dark chocolate brown. I brushed this onto the front of the cabinet and promptly wiped it off using cheese cloth. This glaze dried really quick, so I had to work fact. I then used a soft fluffy paint brush to blend it in.
When the glaze was all dried (I let it dry overnight), I flipped the cabinet around and applied another coat of beige to the back. Let dry over night.
Next day I sprayed the back of the cabinet with polyurethane. Let it dry. Then I applied using a brush, three coats of Minwax quick drying polyurethane sanding with 220 grit sand paper in between each coat, letting them dry completely each time.
I purchase all new hardware. Cost $195.00. Cost of glaze $20.00. Cost of latex enamel $20.00. Cheesecloth (and I went through a lot), $4.00 a bag. I went through 4. Sandpaper about $6.00. Polyurethane can and spray about $20.00.
Time to complete= six weeks. Yes, it was a massive project and took tons of my time but I am patient and able to see the end results so it keeps me motivated.
My research this time included three coats of poly. I hope this will keep my cabinets looking new, longer. I believe this time they will be more durable.
Originally my garbage cabinet worked like this. Open the cabinet and pull the can (on tracks) out. When I did this project I decided to change this. Now the cabinet pulls out a long with the can. I found the conversion kit online and the track kit at Home Depot. Now throwing away a piece of garbage is a "one" step process. I plugged up the holes on the side and moved the handle to the center. This all worked out great.

This cabinet glides out so nicely and there is less wear and tear on the cabinet itself.
Here are some photos of the kitchen cabinet redo. The stained glass that is added to five of the cabinets I made myself 8 years ago when I did the cabinets over. I cut out the five panels of wood and replaced it with the glass. I also added some decorative wood cut- outs to two of the cabinets.


Lots of work, very time consuming but worth it all. The kitchen looks completely different now and I am much happier with the way it looks.
I am very tired now of the whole project and need to take a break. I'm now outside working on the garden. In a month or two I will go back into this project and paint all the insides and do some touch up work around the desk.
Consider this: 4 coats latex, 1 coat glaze, one coat of spray poly and three coats brushed on poly X 44 cabinet fronts. Don't forget the cabinet bases too. Not a project for the faint of heart.
But just think of the money I saved!!!
Now that's thrifty.
Christy


Luv your ideas. Great job. A lot of "do it yourself" seems to work better than hiring a designer, contractor and sub-contractors.
ReplyDeleteIt's empowering to me. Thanks for your ideas and actual results!
Mick Ward.
Hi Christy! Michael told me about your blog site and it's wonderful.
ReplyDeleteYour ideas are fabulous and so creative! Keep them coming!
Beautiful!!! I'm totally inspired! I don't have the patience for a 4-6 week project, but I can see that it was worth it!
ReplyDeleteThis looks so professionally done. Yes, you're right about saving $$ but I don't think I'd have the patience (much less the time)....I've got to see instant results, that's why my cabinets would never look as good as yours!
ReplyDeleteGreat job!
Judy
Wow. That is a lot of work. But your cabinets look great. I'm contemplating re-painting my cabinets this summer and I thank you for your listing what products you used and the steps you followed. It really helps me to have a better idea of what I'm getting myself into. :)
ReplyDeleteWhat a big difference and I love it! Great job with lots of patience you have! Having no patience can cost $$. I'm so anxious to have an additional dining room in our kitchen (I have to check with the city/county if we're allowed to... crossing fingers!)
ReplyDeleteThanks for sharing your beautiful kitchen! ENJOY it!
cynnamama
Wanna come do mine? LOL How beautiful it all turned out. I love it!!
ReplyDeleteDorothy
I Love it !
ReplyDeleteGreat blog, Thanks for the info.
Keep up the good work.
Fantastic job!! Now your kitchen is looking AWESOME!! I'm too thinking about for remodel my kitchen... Thanks for the idea!!
ReplyDeleteWhat a great job! Thanks for sharing your ideas,I'm in the process of redoing my cabinets and this helps. Again great job...
ReplyDeleteI need to find an interior designer for a kitchen that needs serious remodeling, but don't have lots of money to do it with...how do I go about finding one? I have tried looking on the internet, but only find pricy ones...where are the ones you see on shows like HGTV?
ReplyDeleteI wish I could help you with that, but I've always just done my own decorating. The only suggestion I can give you is to look in magazines, ask friends, look at design sites on the Internet and watch all the decorating television shows. This may help you decide what exactly you may want and save yourself lots of money while you do it. Kitchen cabinet companies and the big box stores offer design help with kitchens as well. Gather you information and see what you like. Good luck!! It's fun to design a new kitchen.
ReplyDeleteThank you for the advice. I always enjoying reading about new ideas and methods for DIY projects. When I decided to put in new kitchen cabinets myself I used the Kitchen Cabinet Kit sold by Kitchen Cabinet Depot. I am very happy with the results and it was a fun DIY project.
ReplyDeletegreat ideas!
ReplyDeleteThanks for the awesome idea. I love the first beige colors. Could you possibly tell me what colors you used to get them results??
ReplyDeleteI used a latex enamel-a very light cream color as the base. The top color that I used was a medium taupe. They blended well together.
ReplyDeleteHope this helps!
Awesome They look so good. Congratulations on such a good job.
ReplyDeleteThanks!!
ReplyDeleteHow was the stained glass inserted into the cabinet and held there safely and firmly?
ReplyDeleteThe glass inserts really class up cabinets! How did you get them to remain in place?
ReplyDeleteChristine,
ReplyDeleteThere was a grove in the back of the cabinet (like most cabinets). I placed the glass in and used clear silicone to hold it in place. I laid them flat and let the silicone set up. Once they were dry I put them up.
Christy