Monday, June 24, 2013

Buying Junk

I'm just venting here for a few minutes.......
     For years I've traveled to local thrift stores looking around for junk that could potentially be turned into something useful or decorative. Places like the Salvation Army and Goodwill carry tons of items that are no longer useful to the owners.  Many items are in need of paint, repair work and just someone that sees its potential. You need vision, a creative mind and some time to work on these items.  Prices were never a consideration because it's all cheap...........at least it used to be.

     I am now just amazed, but troubled by how expensive these places have become considering most of what they carry is plain, old junk.  Sometimes I see furniture that needs so much work that it's not even worth purchasing it.  Then I see the price and really want to scream.  What's happened here?  The media.  Television shows that give everyone the impression that there is so much hidden value in junk.  Not so.  Not for most of us. Internet and newspaper stories about million dollar items found at the Goodwill.  Yes, it has happened a few times but when was the last time you bought a painting at the Goodwill that was worth one million bucks? No me, not you...not very often.  I guess this gives thrift stores the right to charge $10.00 for a scratched up, broken picture frame (because maybe it's worth lots of money). Most of the stuff they carry is worthless junk.  Someone like me looks around, finds something for a few dollars, takes it home and converts into something nice. That usually takes lots of time and work on my part. So why do we have to be scalped?

just sayin'

     I know that these places do great things for people in need , but I think they are trying to take advantage of the public who is falling for stories of great riches at the Goodwill. So.....if anyone is listening out there, lower your prices on broken, scratched junk.  There, I said it.

And.......garage sales lately?  Really?  I've had them in the past.  Usually I do it for several reasons. Spring cleaning, things that are starting to collect-in mass and because, they can be fun.  I don't put anything out there unless it's junk.  I can't even bring myself to go to garage sales anymore.  People think their "junk" is actually worth more than what they paid for it! Wow, they all must think people are stupid.

Ok. I'm done venting now.  You may or may not agree with me, but it seems like the price of "junk" has gotten out of control.

Happy Hunting and I hope you find some good junk for a good price!

Christy


  01 02 12

Friday, January 25, 2013

DIY Custom Coasters

I've been working on a bunch of coasters lately. Not really anything original or new, but lot's of fun to make and very practical to have around.  When I first started making these I realized there was going to be some trial and error to get them just right. Some of the problems I ran into were: too many wrinkles in the finished product and some real sticking problems after the coasters was completed.  I tried clear spray and polyurethane but the coasters still were sticky.  I finally tried Polycrylic and it worked perfectly.


Here is what I used:
1. 4" X 4" white tiles.  Plain, cheap tile .17 cents each at Home Depot.
2. Mod Podge-matte finish works best. (found that out the hard way). The gloss dries and remained too sticky.
3. Polycrylic by Minwax This is a must for coasters.  All the other finishing products do not prevent the Mod Podge from remaining sticky. So, if you stack the coasters, they stick together or if you place a hot drink on them, the cup sticks to the coaster.  The Polycrylic works perfect.  No more sticky Mod Podge.  I have always found that to be a problem when using Mod Podge. I also helps to allow them a few days to cure.

4. felt buttons for the bottoms of your coasters.  You can use cork too but for me, it was too much work.
5. Acrylic paints if you want to add some embellishments.
6. Decorative tissue.  I used tissue napkins for these, but you can also use decorative papers.


Here is the tricky part.  Getting that paper napkin onto the tile without a lot of wrinkles left on the tile.  How to do this? Applying the napkin a little at a time.....

Start at the bottom of the tile.  Apply a line (about 1") of Mod Podge and place your napkin onto the tile. Carefully (and I mean carefully with patience) smooth out the wrinkles with your clean, dry finger.  Continue up the tile.  Add one section at time until your tile is covered with the tissue. 

You only have a small window of opportunity to smooth out the wrinkles.  You won't be able to get them all out either, but it gives the tile character.
If the tissue was larger than your tile, don't worry, let it dry and use sandpaper to remove the excess tissue from the sides.

I landed up painting the sides with a coordinating paint.  Sometimes I added some hand painting to the coaster.

Apply two coats of matte Mod Podge on each of the coasters.

Let the tiles dry overnight and then apply 2 coats of the polycrylic. A small can of Polycrylic costs about $10.00.  Seems like a lot, but the can I purchased lasted a very long time. These coasters make great gifts.  They can be custom made for just about anyone that has an interest as you can see from the pictures.
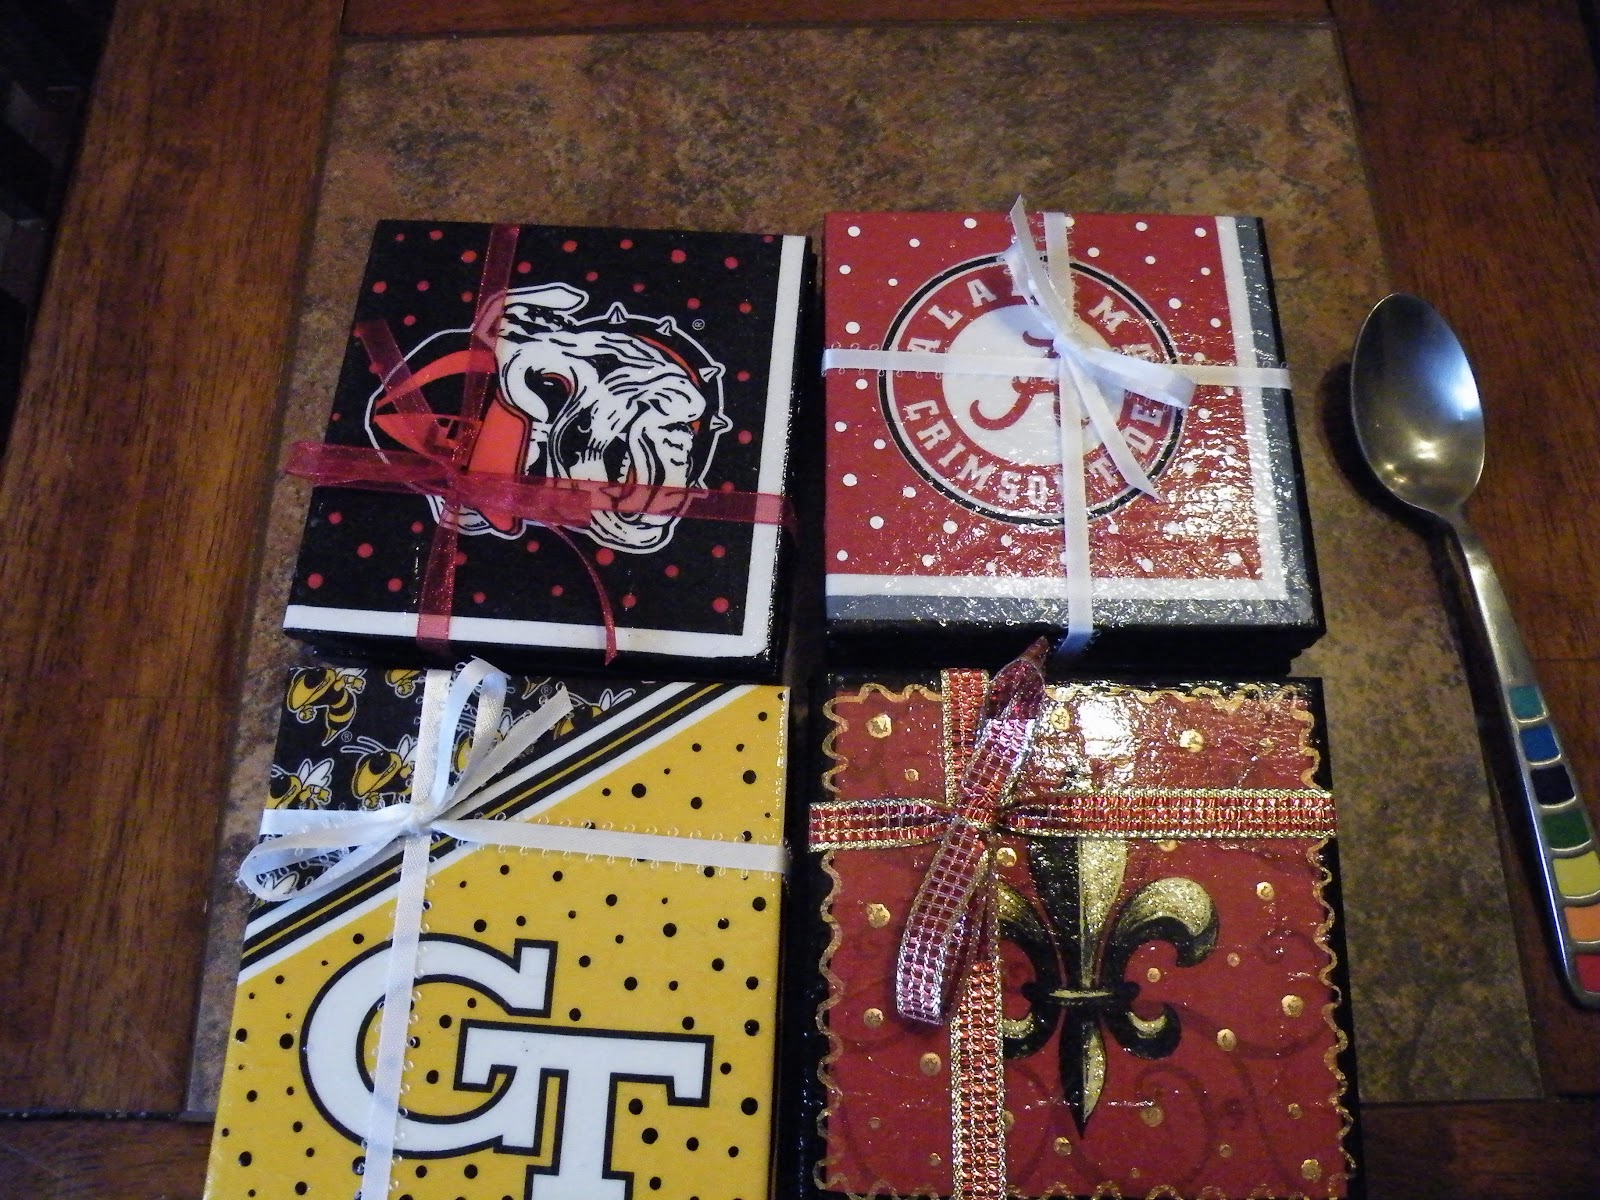
 Here are a few that I just finished:


People seem to love the sports themed coasters. Just about anything goes!


01 02 12

Friday, December 7, 2012

What is Shabby Chic decorating exactly? According to Wikipedia, Shabby chic is a form of interior design where furniture and furnishings are either chosen for their age and signs of wear and tear or new items are distressed to achieve the appearance of an antique. Accessible, affordable, comfortable and eclectic, this popular style features white painted furniture, painted motifs, colors, slipcovers and vintage fabrics.

And, yes I do love the look of Shabby Chic.


I've also noticed that other people love it as well. Let's face it, the vintage, eclectic look is back.  Granny's furniture is now looking very, very good. We no longer look to match everything exactly.  It's a free for all with decorating these days, and that bodes well for all of us!  Thrifty finds, garage sale treasures and furniture that can be converted into WHAT WE WANT, not what some furniture company wants us to buy. Lucky for us, right?
Here are some great examples.  These pieces of furniture probably looked a lot different at one time.

courtesy of: midwestcottage.blogspot.com


courtesy of:a1egyp.egptgiftshops.com

courtesy of: chippycharm.com


I've decided to make myself some Shabby Chic style, framed chalkboards. There was some trial and error involved....as usual, but I finally got a finished product that I liked.


Supplies Needed:
*1 (any size you like) wood frame.  I got mine at the Goodwill for $2.00.
*Spray paint.  Color is your choice. White, cream and robin's egg blue work nice with this style.
*wood cut-outs or embellishments.  Found mine at Michael's Craft store. 2 for $2.00
*black glaze.  Got mine at Lowes.  Valspar black glaze-$18.00.  Not cheap, but lasts a long time.
*large piece of chalkboard found at Home Depot. Measures 2' X 4' for $9.95.  Much more cost effective than buying the chalkboard paint!  I got four chalkboards out of mine.


Directions:

 1. Remove pictures and or glass from your frame.  lightly sand your wood frame.  Don't worry about dings and scratches-it's suppose to look old.

2. Glue on your wood cut outs.  Use a clamp to hold them.  Let dry.

3.  Spray paint your frame with the color you wanted. Let it dry over night. Here is one of the frames (the picture is sideways....ugh), but it has the wood cut outs added to the corners and it's spray painted blue.


Below is a closer view of the wood cut out.


4. Brush on the black glaze liberally.  Immediately wipe off with a rag.


Above is the frame with the addition of the glaze before it's wiped off.

5. Cut your chalkboard to the dimensions you need. I used a jigsaw to cut mine.  The chalkboard cuts very easily.  Sand the sides and then place into your frame. You can use staples or small nails to hold the chalkboard in place.  I my case, the stable were already in the frame.

Hopefully you already have a hook on the back, if not, just add one.

Your done!
Finished product shown below.
This one has the blue undercoat.

This one below has the white undercoat.


 And below......some little stained glass angels I made for our Christmas tree.
Cute, right?


    01 02 12